Show & Tell: My First Lace Closure

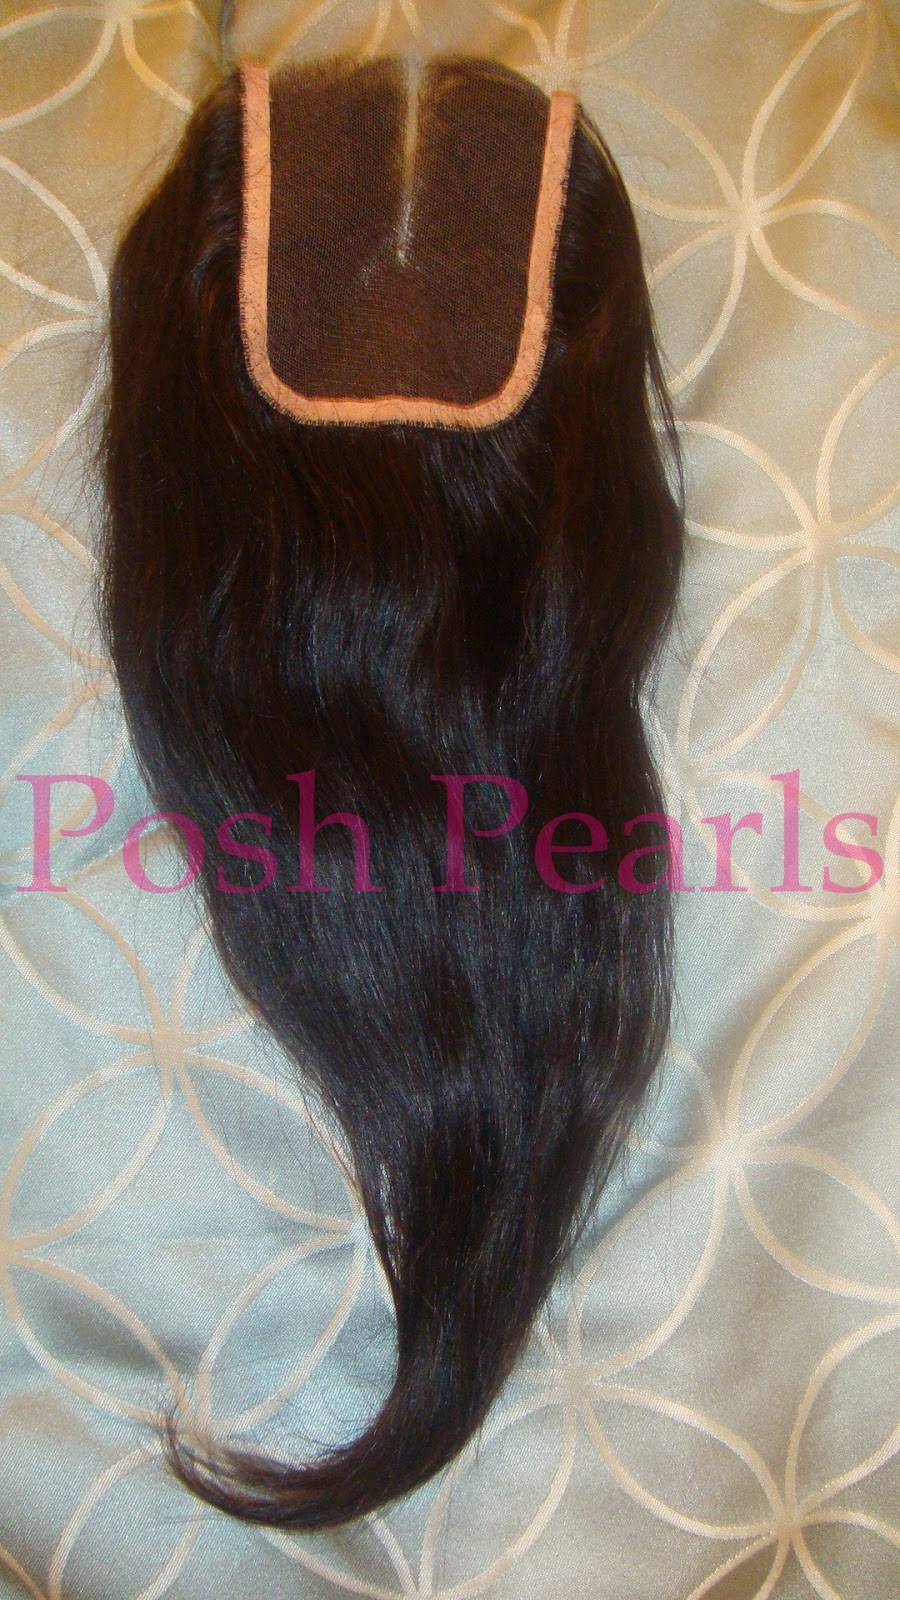
I received my Virgin Brazilian lace closure on Friday *happy dance* The closure doesn't shed, I have been experimenting with it excessively.. and so far it doesn't shed :)

When I place the closure on my arm you can see that it somewhat blends with my skin. 
The closure has a center part. The lace is light brown.
If I try to part it anywhere else the knots are still somewhat visible.
Since knots are still somewhat visible, I will bleach the knots using the video below.


I will install the closure using the sew on method.This is the best video I have seen on Youtube on how to sew on a closure.


The hair + closure will be installed soon. The Filipino Hair will made into a 3/4 wig and the closure will be sewn into my crown area.


Update: See my closure installed HERE


Enjoy your week Dolls :)


Show & Tell : Virgin Filipino Straight Hair

I'm a wavy hair addict, the last time i wore straight hair extensions was 4 years ago. I finally decided to purchase Filipino straight hair after going back and forth between Indian Kinky Curly vs. Filipino Straight.
The middle bundle looks different because I was too excited when I got my package and I unwrapped the weft lol.
The color is the natural color which is like a 1b and it gets lighter at the tips which i love!!
 
First Impressions
This hair is super soft, like buttery soft and there is no wierd smell that Virgin Hair sometimes has. I got 3 bundles of hair as usual : 12", 14" and 18". Concerning the length... it is true to length/maybe even longer. My 18 inch bundle looks more like a 20 inch bundle :) :)
I will seal my wefts for sure because I got a few strands when I was running my hands through the bundles.*sigh* sealing wefts is time consuming but worth it.


The hair will be used to  make a 3/4 wig because it's important to see how the Filipino Hair blends with my real hair. But when I receive the lace closure, I'll sew it to the crown area of my 3/4 wig so i can give my hair a break.
Hairstyle Inspiration
Have a wonderful day dolls :)


How To: Wear Lace Closures (No Glue Methods)

Do you ever get tired of leaving your hair out to blend it with your weave? I do! I get tired of combing, straightening and curling my leave out and I want to give my hair a break. But on the other hand it is always nice to have to have some sort of a part, unless I am doing a full bang weave like this:

 I tried the invisible part method last year after seeing Youtube videos and never again will I do it. Applying glue to your hair is a NO under all circumstances. Please do not apply glue to your hair! Instead you can use a closure. A top closure is a top piece that is added to the to the crown of your head to give the illusion of a natural part.


I have known about the existence of closures for a while now but they never appealed to me because I would always see people glue it on and I have a NO GLUE RULE.
Recently I came across two Youtube videos that show how to wear closures with  no glue at all. 
This is how to sew on a closure

Another option is to wear it using the elastic band method.
The elastic band method is so genius... great method for those cannot do cornrows or sew hair.


I will be purchasing a lace closure with my next hair so I can try out both methods for myself. I hope this post helped someone.
 
Have a wonderful week :)

DIY : Ombre Hair Using Virgin Brazilian Hair Extensions

This post is long overdue.. (understatement of the year!!!)

My Inspirations:


What I used:
Vol. 20 developer
Garnier Belle Color (73 Dark Golden Blonde)


Lifting the color of Virgin Hair was way harder than I thought, you need a lot of patience if you don't use bleach. I think it took so long because I used a vol 20 developer. If you want to speed up the process use a vol 30 or vol 40 developer.

The quality of the hair wasn't affected by the dye. I made sure I deep conditioned after to prevent dryness. I'm happy I finally did it after months of procrastination. The only thing I wish is that the tips were a little lighter so I may attempt to make the tips a little lighter. Now this is done, I am ready to move on to my next hair style so I'm not sure that's going to happen.


Have a wonderful week :)


DIY : 3/4 Wig Using Indian Remy Kinky Curly Hair Extensions

I made a Kinky Curky 3/4 Wig for my friend this past weekend. She purchased 3 bundles: 16,18 and 20 inches in a Color 1B. The length looks shorter because with Kinky Curly hair the length is measured while the hair is straight. So when the hair is processed to the kinky texture, it appears shorter. Keep this in mind when purchasing Kinky Curly Hair. The hair is so soft and the texture is mix of curls and ringlets.
Inspiration: Teyana Taylor

Inspiration: Kelly Rowland


 The mark on the cap is from my eyeliner I used it to mark where I wanted the u-part. 

She is relaxed and her hair is not blended with the wig yet.


We were both pleased with the final results. So there you have it folks... The first 3/4 wig I made for someone else :)

Show & Tell: Indian Remy Kinky Curly

Don't get too excited... this hair is not mine :(
I am making a 3/4 wig for a good friend who asked if I could make one for her. She was inspired by Teyana Taylor's hair and the hair is Indian Remy Kinky Curly in a Color 1B (16, 18 and 20 inches)... you all know I have this hair on my 2012 hair wishlist so to say I am jealous is an understatement. I can't wait to see the finished results on her.
Using the chart below I would say the texture is a mix of 3c and 4a curls..i think.
Here's a picture of the 14 inch Bundle:
This hair is making me consider postponing my Filipino hair purchase. I really want to try the Filipino hair first because it is different and I haven't worn straight hair in years. This hair will be perfect for spring/summer.


UPDATE: See the 3/4 Wig I made with this hair HERE

Virgin Brazilian 3/4 Wig-One Month Review

This Brazilian Hair 3/4 wig was initially installed in Dec 2011.I got so many compliments throughout my vacation and no one still believes I can actually do my own hair.
NO HEAT was used to style the hair for the 3 weeks I was away and I traveled with only bendy rollers so that is all I used to curl the hair.The only product I used on it was Argan Oil.The only issue I had was with the bangs. Styling bangs with bendy rollers is tricky and most Youtube Gurus use a flat iron to style their bangs. So i ended up wearing the hair to the side of my face not full on in my face.

No heat at all!!
One month later and I am still in love with this hair :D I have taken this 3/4 wig off three times throughout the month to care for my real hair. I love the versatility of 3/4 wigs.


One of my main goals this year is to learn to style hair better. I suck at using a flat iron to curl my hair. I am pretty good with bendy rollers and I am satisfied with the curls I get from using bendy rollers but I really want to improve my heat styling skills.

Before I started making 3/4 wigs, I could not do hair at all...AT ALL.. not even cornrows. I am still learning to do cornrows and the good thing is that the cornrows do not have to be neat because no one is going to see it.  If I can do it, then you can so I encourage you try.

So whats next for this hair? I am doing the Ombre look as soon as I have the time.

Have a great weekend dolls x

DIY : Kinky Straight Blow Out Wig

Revisiting my favorite texture of all time... kinky straight. This time I constructed my own wig with two 16 inch bundles and a 12 inch lace...